
Bokashi - Fertiliser Production In A Small Space
Use fermentation to make fertiliser and nutritious soil
Have you ever heard of Bokashi? The word comes from Japanese and means something like “fermented everything”. Under the right conditions, kitchen waste can be processed into fertiliser or humus-rich soil. In this article, find out exactly how to make Bokashi yourself and what you should watch out for.
Who can make Bokashi?
Since you don't need a lot of space to make Bokashi, there are few restrictions. It can easily be made in a small garden or on a balcony. Production is even possible inside as there are no unpleasant odours. When made properly, the smell is reminiscent of sauerkraut. Bokashi can also be used by garden owners as a supplement to composters.
What do I need to make Bokashi?
The most important piece of equipment is a Bokashi Bucket. If you want to process kitchen waste regularly, it's best to buy two. You also need either biochar, RoPro or Bokashi bedding. Some users also swear by the addition of rock dust, but this is not absolutely necessary. Finally, you also need effective microorganisms to spray over the contents.
What goes in the Bokashi bucket?
Basically, anything that can be composted can go into a Bokashi bucket. The most important thing is not to put any spoiled or mouldy waste in the bucket.
- Cut down on kitchen waste
- Coffee grounds and tea leaves
- Lawn clippings
- Withered plant remains
How exactly do I make Bokashi?
Don't worry, it really isn't rocket science!
- Collect kitchen waste in a container and put it in the Bokashi bucket as soon as possible.
- Sprinkle charcoal or something similar on top.
- Spray effective microorganisms undiluted over the contents.
- Press the mass firmly to force excess oxygen out.
- If the bucket is not filled regularly, weigh it down with a sandbag.
- Seal the bucket with the lid, making it airtight.
Repeat these steps until the bucket is full. About twice a week, the leachate (waste liquid) should be drained. Depending on the contents of the bucket, this can be a wide variety of colours. But don't discard this. Instead, use it to produce a high-quality liquid fertiliser - simply dilute it with water in a ratio of 1:100 and water your plants with it. You can also use the juice pure as a drain cleaner.
When the bucket is full, cover with RoPro litter or similar and spray with effective microorganisms. Now leave the bucket alone for at least two weeks. During this time, the fermentation process takes place. The content does not change visually, but its PH value will drop.
What should I do with my finished Bokashi?
Your Bokashi is now ready, but don't use it directly as a fertiliser. The fresh content would totally overwhelm plant roots. Instead, there are several options for converting your Bokashi:
- Bury before planting
About ten days before you start planting, bury the Bokashi in the ground. This regulates the PH so that it won't damage any plant roots and will become the ideal fertiliser. - Transform into fertile soil
Mix your Bokashi with topsoil, mixing two parts Bokashi with one part topsoil and waiting around eight weeks - Accelerate composting
For anyone who owns a compost pile, this is great news - Bokashi can speed up the composting process significantly. Simply dig your finished Bokashi in and make sure that little to no air reaches it.
You don't need a large garden or composter to make your own fertiliser and fertile soil from kitchen scraps. If you want your plants to be well taken care of, give Bokashi a try. The process is absolutely fascinating. Bokashi is not in vogue for nothing!
Related products
-
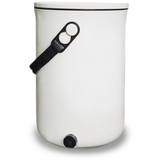
Multikraft Organko Bokashi Household Bucket 2.0 - 9.6L
- Conversion of organic waste into fertiliser
- Fast and odourless application
- Significantly improves soil quality
-

Multikraft "EM Aktiv", 1 Litre
- Contains effective microorganisms
- For gardens, compost, ponds, etc.
- Prevents putrefaction
-
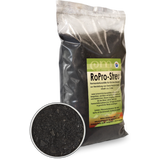
Multikraft RoPro Litter - 3L, 3 l
- Produce Terra Preta
- Beneficial for the build-up of humus
- For the Bokashi household bucket
Magazine Articles:
Discover Bloomling:
-
Great Britain: Free standard delivery from £69.90
-
Free
returns More than 6.800 products
Secure payments
with SSL encryption technology
